Creating an Organization
Summary
This guide walks you through the steps to create a new organization and its first member in TriEvents.
Requirements
In order to create an organization, a user will need:
- An email address to create the first user.
- A bank account to receive funds from ticket sales.
- You will need the Transit number, Institution number and Account number for setup.
How to Create an Organization
- Navigate to TriEvents.ca
Open your web browser and go to TriEvents.ca to begin the setup process. - Click "Get Started"
FromOn themainTriEventspage,homepage, click the Get Started button toreachbeginthecreatingauthenticationyourpageorganization.

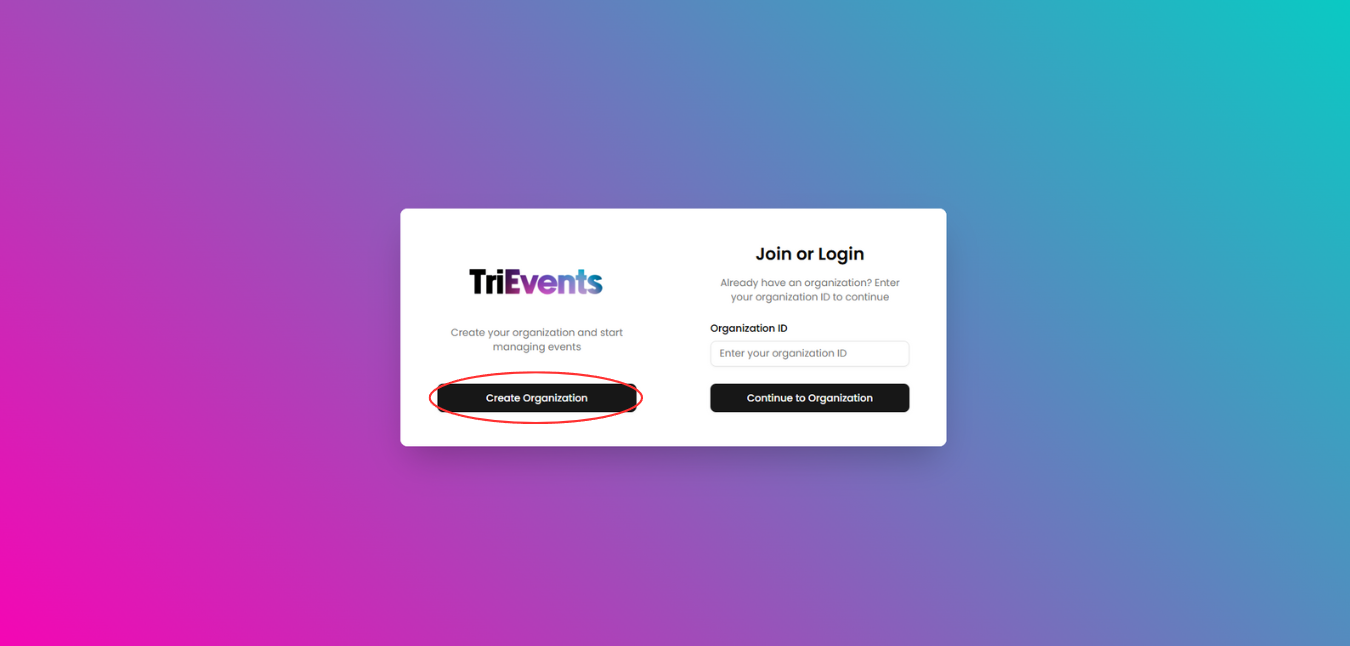
- Click "Create Organization"
On the authentication page,click theselect Create Organizationbuttonto begin setting up your organization.
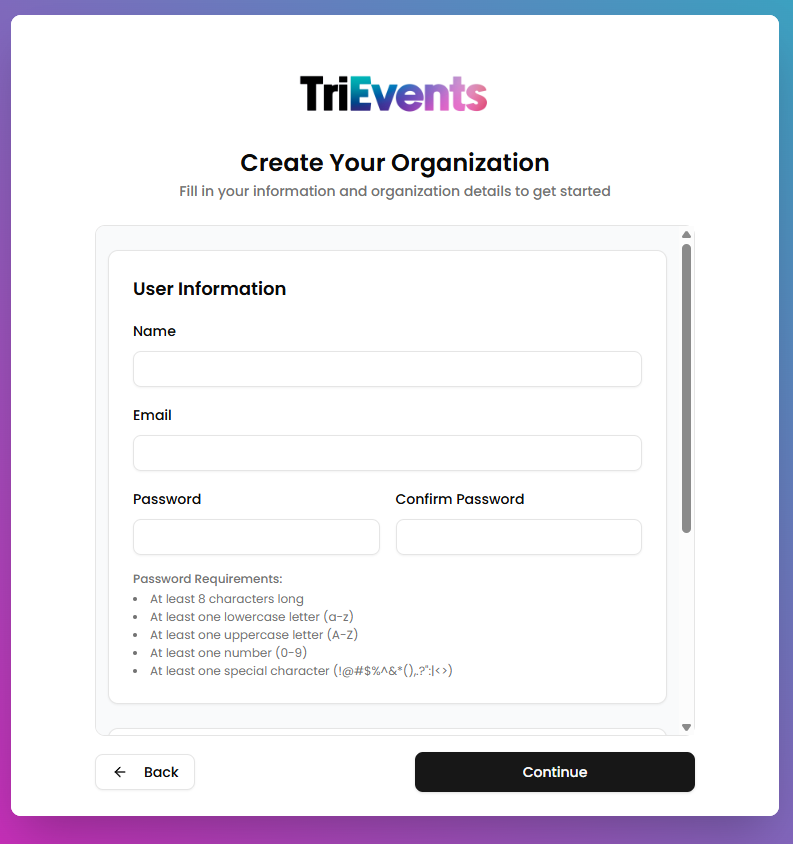
- Fill in User Information
ThisEnterinformationthewill be useddetails to create the first user intheyourorganization. Provide the following information:organization:
- Name: Your full name
- Email: Your email address
- Password:
TheA secure password for your account
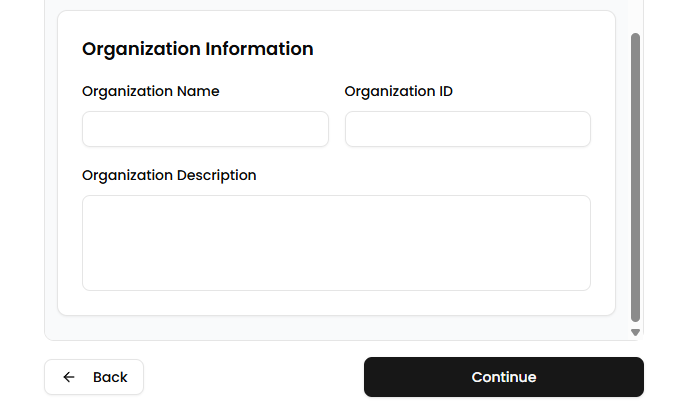
- Fill in Organization Information
ThisProvideinformationthewill be useddetails to create your organization.MakeBe sure to remember your Organization ID, asitit'swill be usedrequired toidentifylogand login to your organization. Please provide the following information:in.
- Organization Name: The full name of your organization
- Organization ID:
UniqueAtouniqueyour organization,identifier usedtoforidentifyloggingand login to your organizationin - Organization Description:
TheAdescriptionshort summary of yourorganizationorganization’spurpose or activities

- Click "Continue"
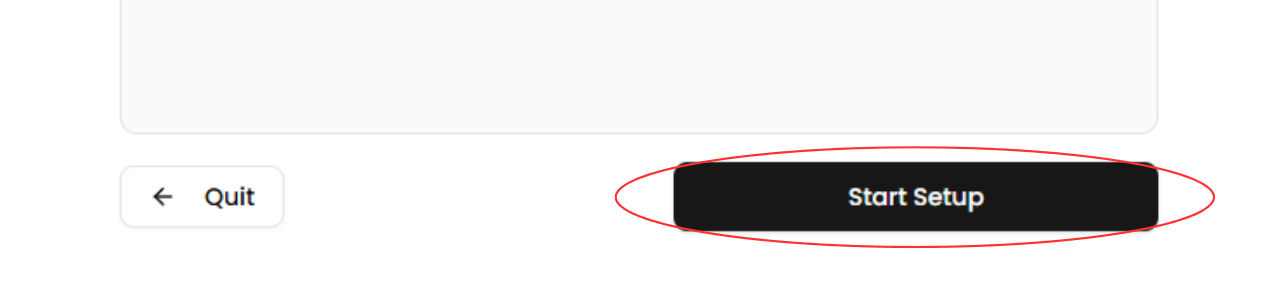
ClickOnce all required information is entered, click the Continue button tocontinueproceed with setting up yourorganization setup.organization. - Click "Start Setup"
After being redirected to the next page, clickClick the Start Setup button tocontinuemove forward withtheconfiguringsetup.your organization’s details and settings.
- Click "Add information"
Click the AddinformationInformationbutttonbutton to begin the financialonboarding.onboarding process for your organization.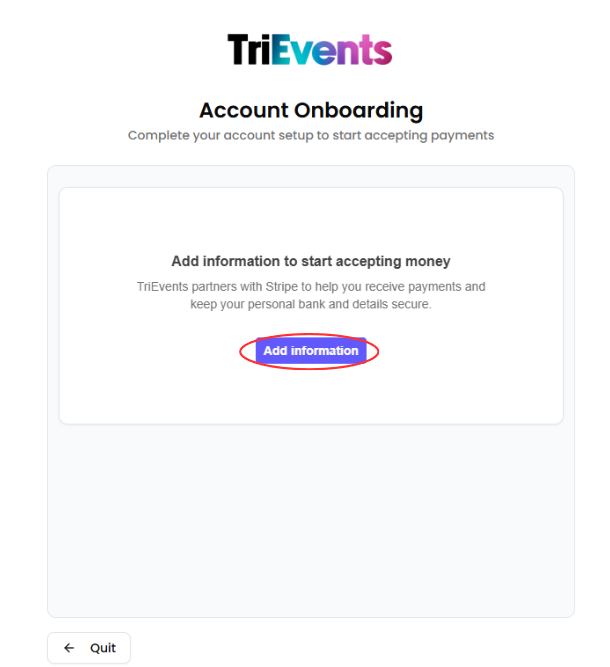
- Create or Login to Stripe account
A new window will open prompting you tocreateconnectorwithloginStripe. This is required toyourprocessStripepaymentsaccount.andIfreceiveyouticketwantrevenue.toTo proceed:
- To use an existing Stripe
account,account:loginLogtoinit,withotherwiseyour credentials. - To create a new Stripe
account.account: Follow the on-screen instructions to set one up.
- To use an existing Stripe
- Navigate through financial onboarding pages
Fillout your personal information as you navigateNavigate through the financial onboarding
pages.pagesMakeandsureprovidethatthe required personal and organizational details. Ensure allof thisinformation is accurate.Upon
On the final page, clickreachingtheAgree andsubmitSubmit.buttonOnceandsubmitted, your organization will becreated.createdYouand you will be redirected totheyour organization's dashboard.